Showing posts with label dell inspiron mini 9. Show all posts

Saturday, April 3, 2010

Broadcom Wireless Driver Fix In Lucid

For yet another release, Ubuntu 's Driver Manager is unable to properly install the Broadcom Wireless driver.

Some users are getting a permission error, telling them that they are not authorized to perform this action:

broadcom error

or Ubuntu is just not recognizing the card:

28 - Hardware Drivers Error

The Broadcom wireless card that came with the Dell Mini 9/10 or Vostro A90 does work in Ubuntu 10.04 Lucid Lynx. You just have to manually install it.

Manually installing the driver can be done two ways:
Connect to the internet via a wired connection. Then go to Synaptic Package Manager (System>Administration>Synaptic Package Manager)
30 - synaptic reload
- Click the Reload button in the upper left corner of Synaptic to refresh your repository index.

Screenshot-Synaptic Package Manager
- Then install the bcmwl-kernel-source package

OR: after connecting to the internet via a wired connection in a terminal type:
sudo apt-get update
sudo apt-get --reinstall install bcmwl-kernel-source
-Reboot the machine. Afterwards you will see the driver installed and working.

broadcom fixed

Have a question or problem that this article doesn't cover?
Ask our Ubuntu Mini 9 Google Group for help.

Wednesday, December 9, 2009

Chromium is Now Complete

Chromium the open source web browser on which Google Chrome is based is finally complete. When I first wrote about Chromium back in July, I found it to be a very fast and capable browser, but it lacked the features I needed to be productive on the web. Since then Chromium has finally reached the maturity level to compete with other major browsers, it now features:
- native GTK theming
- flash playback
- bookmark sync (through your google account)
- extensions

Extensions - Chromium

It will only be a matter of time until we see the most popular features of Firefox, Opera and other browsers make their way to Chromium via extensions. Until then I'll just enjoy Chromium's fast startup time and rendering engine.

For those not yet running Chromium installing the ppa is incredible simple in Ubuntu 9.10.
sudo add-apt-repository ppa:chromium-daily/ppa
- to automatically add the Chromium PPA and GPG Key
sudo apt-get update
- update your sources
sudo apt-get install chromium-browser
- install the browser and it's dependencies

If you running an older version of Ubuntu use this guide to manually install the Chromium Daily Build PPA.

sudo apt-get chromium-browser installs the chromium-codecs-ffmpeg package by default. This package contains only the free ogg, vorbis and theora codecs needed for the HTML5 audio/video tags. If you want to install the free ogg, vorbis, theora codecs, as well as, the non-free H.264, MP3 and AAC codecs install the chromium-codecs-ffmpeg-nonfree package.

In a terminal type:
sudo apt-get install chromium-browser chromium-codecs-ffmpeg-nonfree
- to install the browser and non-free codec together
sudo apt-get install chromium-codecs-ffmpeg-nonfree
- to install the non-free repository after installing the Chromium browser.

You may be asking why I'm writing about Chromium when Google just announced Google Chrome Beta for Linux? I prefer to support Chromium because it is open source software and receives features before Google Chrome. The only real difference between the two browsers is the non-free codecs, and installing them in Chromium is easy. If you're not ready to take the Chromium plunge, you can install the Google Chrome browser by clicking here, n00b.


Have a question or problem that this article doesn't cover?
Ask our Ubuntu Mini 9 Google Group for help.

Wednesday, November 11, 2009

Broadcom Wireless Driver Fix In Karmic

This works for the Dell Mini 9/10v & Vostro A90.

Usually installing the proprietary Broadcom wireless driver in Ubuntu is handled with couple mouse clicks by the Hardware Drivers (aka jockey-gtk). But Ubuntu 9.10 Karmic Koala has shipped with a bug that makes jockey unable to recognize the card and install the driver. No worries, the fix is incredibly easy and only requires a wired internet connection.

28 - Hardware Drivers Error
- Ubuntu is unable to recognize and install the Broadcom Driver via the Hardware Drivers.

First connect to the internet via a wired connection. Then go to Synaptic Package Manager (System>Administration>Synaptic Package Manager)
30 - synaptic reload
- Click the Reload button in the upper left corner of Synaptic to refresh your repository index.

Screenshot-Synaptic Package Manager
- Then install the bcmwl-kernel-source package

OR: after connecting to the internet via a wired connection in a terminal type:
sudo apt-get update
sudo apt-get --reinstall install bcmwl-kernel-source

33 - jockey check
-Reboot the machine. Afterwards you will see the driver installed and working.

Enjoy the freedom!

Have a question or problem that this article doesn't cover?
Ask our Ubuntu Mini 9 Google Group for help.

Installing Ubuntu 9.10 Karmic Koala

This guide will walk you through the steps of installing Ubuntu 9.10 Karmic Koala on you Dell Mini 9 & 10v and Vostro A90.

Known Issues:
  • The Broadcom wireless card driver does not install correctly on the Dell Mini 9/10v and Vostro A90.
  • The Dell Vostro A90's audio does not work out of the box
The fixes are at the end of the guide.

1. Download Ubuntu 9.10
- I chose to install the standard 32bit Ubuntu Desktop Karmic .iso
- Ubuntu Netbook Remix is broken, and I would advise against it if you are installing Ubuntu 9.10

2. Prepare Your Install Media
- I prefer to use my external DVD drive but you can also use a LiveUSB stick to install Ubuntu. Follow these directions for creating a LiveUSB image and check our usb flash drive compatibility list for recommendations on drives.

3. Boot Into Your Install Media


- By default the Mini 9/10v and Vostro boot from the hard disk first, you need to tell the mini to boot into your install media.
- Boot your PC, when the Dell splash logo appears hit the zero (0) key to access your one time boot list. Use the DVD/CD drive option if installing from disc or the Removable Devices option for a LiveUSB install.

4. Installing Ubuntu 9.10 Karmic Koala
Step 1 - Choose Your Install Language
3 - install

Step 2 - Choose Your Location
5 - location

Step 3 - Choose Keyboard Layout
7 - keyboard

Step 4 - Partitioning the Disk
9 - disks
- There are three options for installing Ubuntu
  1. If you plan on dual booting you may want to choose the Install them side option. A slider will appear and allow you to resize your partitions. This method is recommended for users that are uncomfortable with manually partitioning their drives but want to dual boot. Make sure to defragment your Windows drive before you install Ubuntu so you don't lose data.
  2. Erase and use the entire disk is not recommended. If you plan on deleting the whole hard disk and not dual booting booting it is recommended that you partition the drive manual using the last option, it is easy and allows you to separate your /root and /home partitions. Doing this is great to protect against data loss if your install/upgrade goes bad later.
  3. Specify partitions manually is recommended and not hard. The rest of the install guide will focus on it. It is the best way to install Ubuntu on your Dell Mini/Vostro.
10 - partitions
- Ignore the /dev/mmcblk0p1 in the picture, it is my SD card. I had it in while installing to save screenshots on.
- Your Mini/Vostro hard drive will be /dev/sda

11 - delete_paritions
- Right click the partition to delete/resize it.
- Depending on your space you have some options/decisions.
- For this guide will will be preforming a clean install with a separate /root and home partition on a 8GB SSD.

13 - add partition
- After freeing hard drive space for Ubuntu, right click your free space and select add to create a /root partition

15 - root
- Your /root should be at least 2GB but realistically closer to 4GB to avoid future problems. The root partition is where the operating system and programs are stored. I chose to use half the size of my 8GB drive for my /root partition but could have safely went as low as 2.5GB - 3GB.
- 1GB = 1024 megabytes
- The /root partition type should always be primary, start at the beginning and its mount point is /
- The file system selection is up to you, Ext4 is recommended and the fastest. Other users prefer Ext3 for its rock solid stability or Ext2 because it does not journal. Journaling protects against data corruption in the case of a power failure or system crash but it also writes more frequently to the solid state disk. Most users will want to Use Ext4, it is Ubuntu's default section.

17 - home
- Your Home folder will be the rest of your hard drive space. The home partition is where all your personal data and program settings are stored.
- The /home partition type is logical, should start at the beginning and its mount point is /home
- Again the file system selection is up to you, Ext4 is recommended.

19 - disk done
- As you can see I split my 8GB drive in two, half for my operating system /root and half for my personal files and settings /home.

21 - noswap
- After clicking forward you will see this pop message. This guide does not create a swap partition for Ubuntu. Swap is used by the operating system to store and retrieve data from secondary storage for use in main memory. It is not really need and if you don't have a large drive it is unnecessary.
- You can chose to go back and resize you partitions to create a swap partition. A 1GB swap partition is recommended, anything more would be overkill on a netbook.
- If you want to hibernate your Mini/Vostro you will need to create a swap partition.

Step 6 - Who Are You?
23 - setup
- Enter your information, user name and password.
- You can choose to encrypt your home folder. There is a slight performance hit if you choose to encrypt your home folder but it is negligible. I have two identical drives STEC SSD drives, one is encrypted and one unencrypted, I can not tell the difference between the two.
- Encryption is a good idea if you travel, are paranoid, or just don't want anyone accessing your files.

25 - install ubuntu

- This is the final check list before hitting install. Make sure everything is correct and begin the installation.

27 - done
- Reboot the machine so we can fix the wireless card driver and the audio on the Vostro A90.

5. Install The Broadcom Wireless Card Driver
- Usually installing the proprietary Broadcom wireless driver in Ubuntu is handled with couple mouse clicks by the Hardware Drivers (aka jockey-gtk). But Karmic has shipped with a bug that makes jockey unable to recognize the card and install the driver.
28 - Hardware Drivers Error
- First connect to the internet via a wired connection.
- Then go to Synaptic Package Manager (System>Administration>Synaptic Package Manager)
- Click the Reload button in the upper left corner of Synaptic to refresh your repository index.
- Then reinstall the bcmwl-kernel-source package

Screenshot-Synaptic Package Manager
- Click to enlarge

OR: after connecting to the internet via a wired connection in a terminal type:
sudo apt-get update
sudo apt-get --reinstall install bcmwl-kernel-source

-reboot the machine, afterwards you will see the drive installed and working.
33 - jockey check

6. Fix the Audio on the Dell Vostro A90
- You need to add a line to your /etc/modprobe.d/alsa-base.conf file
- In a terminal type:
sudo gedit /etc/modprobe.d/alsa-base.conf
- then add this to the bottom of the alsa-base.conf file:
options snd-hda-intel model=dell
- then reboot the machine for the changes to take effect.


Have a question or problem that this article doesn't cover?
Ask our Ubuntu Mini 9 Google Group for help.

Friday, October 23, 2009

Ubuntu 9.10 Netbook Benchmarks

Phoronix is a Linux technology website focusing on product reviews, distribution screenshots, interviews, and news. It is one of my favorite Linux sites and the best site for info on Linux graphic drivers. Today Phoronix released a benchmark comparison between Ubuntu 9.04 Juanty Jackalope and the upcoming 9.10 Karmic Koala release on the Dell Mini 9.

Most of the article is positive, Dell Mini 9/Vostro A90 owners should rejoice. Here is a quick summary:
"There is just one week left until Ubuntu 9.10 "Karmic Koala" will be released, but is it worth the upgrade if you are running a netbook? From our testing of the development releases, it is most certainly worth the upgrade, especially when compared to Ubuntu 9.04 with its buggy Intel driver stack that caused many problems for Atom netbook users. Ubuntu 9.10 brings many usability improvements to the Linux desktop, various new packages, and the overall system performance has improved too. We have ran a set of benchmarks on both a Dell Inspiron Mini 9 and Samsung NC10 under Ubuntu 9.04 and 9.10 to illustrate the performance gains along with a few regressions."

You can find the complete article on www.phoronix.com.

If you can't wait the week and want to make the jump to Karmic, the Release Candidate has been pushed out today. You can download it here.


Have a question or problem that this article doesn't cover?
Ask our Ubuntu Mini 9 Google Group for help.

Wednesday, October 21, 2009

20% Off Refurbished Dell Minis @ Dell Outlet

Dell is currenty running a 20% off & free shipping on all Dell Mini models at it's outlet store. This includes the Dell Mini 9, 10 & 10v. All Dell outlet purchases come with the same 1 year warranty as new purchases.

While I personally love/recommend the Mini 9, the Dell Mini 10v is an excellent machine despite it's RAM upgrade procedure. It offers a larger screen (although the same resolution) and keyboard. Remember the Dell Mini 10 should be avoided at all costs.

From WIkipedia:
The Intel System Controller [that the Dell Mini 10 uses] Hub US15W for the Atom processor Z5xxseries features a GMA 500 graphic system. Rather than being developed in-house, this core is a PowerVR SGX 535 core licensed from Imagination Technologies.[22] Since PowerVR is not cooperative with the open source movement, this has resulted in the dependence on outdated closed source Linux drivers.[23]

Direct Link to the Dell Outlet Mini Section

Use Coupon Code: 56RK57G2H1ML9V

Remember I don't work for Dell or make a dime off from Dell for this post, I just wanted to hook you guys and girls up with a sweet deal. Tell your friends, mention that they can always come to www.ubuntumini.com for help.


Have a question or problem that this article doesn't cover?
Ask our Ubuntu Mini 9 Google Group for help.

Tuesday, October 6, 2009

Dell mini 9 Part Numbers

Below is a list of Dell part numbers for the Dell Mini 9.

Bottom Plastic Assembly
D714J Bottom rubber feet, back,910(Qty:2)
F502J Bottom rubber feet, front,910(Qty:2)
M264K (Order for K881H)Bottom cover service kit, include Bottom cover assembly, Bottom rubber feet(front*2, back*2), LCD rubber(left*1, right*1)&COA replacement label
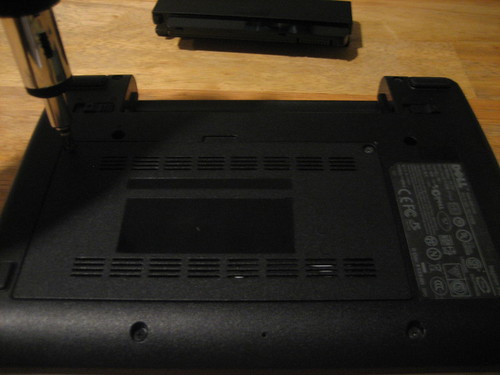
N303H Bottom door, 910
T363H Microphone assembly (include cable), 910

Cables and Cords
5120P Power Cord, 6FT, US
6F190 Power Cord, TapeBackup, 6FT, 125V
78390 Power Cord, 2.0M, Inner-Europe
95095 Power Cord, 2.0M, Denmark

Documentation
H839J Ubuntu tech book Spanish
H840J Ubuntu tech book English
K550J Ubuntu tech book French
M770H Setup Quick Reference Guide English
M861H Setup Quick Reference Guide Brazilian Portuguese
M866H Setup Quick Reference Guide Spanish
N260J Ubuntu tech book Brazilian Portuguese
N620H Setup Quick Reference Guide French

Hard Drives, Accessories
D154H SSDR,8G,PATA,4GX2,STEC
R832H SSDR,4G,PATA,4GX1,STEC
X422G SSDR,16G,PATA,4GX4,STEC

Heatsinks, Fans and Accessories
D966J Thermal Pad, 910

Keyboards and Mice
G714K Travel Bluetooth Mouse (Fievel Black), 5 Buttons, Black, WW, APOS
G716K Travel Bluetooth Mouse (Fievel White),5 Buttons, White, WW, APOS
M958H Keyboard-Single pointing, US English
P690H Keyboard-Single pointing, Brazil
T309H Keyboard-Single pointing, French
T809K Travel Bluetooth Mouse (Fievel Red),5 Buttons, Red, WW, APOS
T811K Travel Bluetooth Mouse (Fievel Pink),5 Buttons, Pink, WW, APOS
U061H Keyboard-Single pointing, US-Internal
Y919H Keyboard-Single pointing, French/Canadian

Label
T8912 Blank COA Label, Use for COA Label Replacement

LCD Plastics, Covers, Accessories
G558J LVDS cable only, 910
H243J LVDS and camera cable, 910
J126H LCD cover, Black IMR, WLAN antenna included, 910
J836H LCD bezel with camera hole, silver, 910
K116H LCD cover, White IMR, WLAN antenna included, 910
M884K LCD hinge svckit, include Left LCD hinge and Right LCD hinge, 910
N302H LCD bezel without camera hole, silver, 910
N740H LCD cover, White IMR, WWAN antenna included, 910
R098H Left LCD hinge, 910
R099H Right LCD hinge, 910
R181H LCD cover, Black IMR, WWAN antenna included, 910
T086H Camera assembly,0.3M with cable, 910
T087H Camera assembly, 1.3M with cable, 910
X048J LCD bezel service kit, with camera hole, silver, 910(Include LCD bezel with camera hole, LCD left/right rubber)
X049J LCD bezel service kit, without camera hole, silver, 910(Include LCD bezel without camera hole, LCD left/right rubber)
X050J Camera assembly service kit, 0.3M, 910 (Include 0.3M camera, LVDS camera cable, LCD left/right rubber)
X051J Camera assembly service kit, 1.3M, 910 (Include 1.3M camera, LVDS camera cable, LCD left/right rubber)
X052J LCD cover service kit, Black IMR, WLAN antenna included, 910 (Include LCD black IMR cover, LCD left/right bracket, LCD left/right rubber, Screws 4270E*4, 7M490*6 )
X053J LCD cover service kit, White IMR, WLAN antenna included, 910 (Include LCD white IMR cover, LCD left/right bracket, LCD left/right rubber, Screws 4270E*4, 7M490*6 )
X054J LCD cover service kit, White IMR, WWAN antenna included, 910 (Include LCD white IMR cover, LCD left/right bracket, LCD left/right rubber, Screws 4270E*4, 7M490*6 )
X055J LCD cover service kit, Black IMR, WWAN antenna included, 910 (Include LCD black IMR cover, LCD left/right bracket, LCD left/right rubber, Screws 4270E*4, 7M490*6 )

LCD/Display Assembly Service Kit
X046J 8.9 WSVGA LCD service kit,LED,Truelife(Incluede LCD panel, LVDS only cable, LCD left/right rubber)

Memory
GY767 512MB, 800, 64X64, 8K, 200, 1GBIT
PP102 1G,800,128X64,8K,200,1GBIT
TX756 512MB,800,64X64,8K,200

Modems, Accessories
NW147 USB 56K External Modem

Motherboards
D169H Power daughter board and cable, 910
X057J Mother board service kit-UMA W/WLAN WO/WWAN(include including MB PWA, power daughter board and cable, BIOS CD, and Thermal Pad), 910
X058J Mother board service kit-UMA W/WLAN W/WWAN(include MB PWA, power daughter board and cable, BIOS CD, and Thermal Pad), 910

Palmrests
M883K Palmrest svckit, include Palmrest assembly and Thermal Pad(Qty:3),910

Power Source
C901H Battery, primary, 32WHR,4C,Simplo
H751H Reserve battery, 910
Y635G Battery, primary, 32WHR,4C,Dynapack
Y877G AC Adapter, 30 Watt, 2-pin, US (2 in 1, include adapter and PWR cord)

Screws
4270E Screw, M2X3,HINGE_BRK to LCD PANEL(Qty:4), Rubber Deme BRK to UP(Qty:2), POWER PCB to palmrest Assembly(Qty:2), BT to palmrest Assembly(Qty:2), SSD to MB (Qty:2), Wireless MINI Express Card to MB (Qty:2), WWAN MINI Express Card to MB(Qty:2)
4911U Screw, M2.5X6, Keyboard Support to bottom base(Qty:7), bottom base to palmrest assembly(Qty:9), Bottom base to KeyBoard(Qty:2)
7M490 Screw, M2.5X4,HINGE_BRK to LCD COVER(Qty:6), Speaker to LCD COVER(Qty:3), MB to Bottom base (Qty:2), KENSINGTON BRACKET to bottom base(Qty:2),HINGE to bottom base(Qty:2), RAM DOOR to bottom base(Qty:2)

Software
J941H Resource DVD, N-series, 910
J942H Resource DVD, 910
K633C Dell Webcam Central for Consumer
P896H Linux UBUNTU 8.04+, CD, Send New
T558J WXP Home SP3, Low cost, English

Speakers
P162H Integrated speaker, 2X2W, 910
X056J Speaker sevice kit, 2X2W, 910 (Include speaker assembly, LCD left/right rubber)

Wireless
J613H Wireless bluetooth module (include cable)
KM266 Wireless Modem, 5530 Mobile Broadband Mini Card, (3G, Europe & Asia (Vodafone, Teliasonera))
M348H Wireless mini card, BCOM,(WW except JPN and US)
T137J Wireless card, BCOM, 4312,US,ASKEY (US only)
N204H Wireless mini card, BCOM, (US only)
X596H Wireless mini card, BCOM, WW, (WW except JPN and US)
XX982 Wireless Modem, 5530 Mobile Broadband Mini Card (HSDPA - Cingular)- For US (3G, US AT&T)

Source


Have a question or problem that this article doesn't cover?
Ask our Ubuntu Mini 9 Google Group for help.

Wednesday, September 23, 2009

Upgrading the Wireless Networking Card

This guide will go over how to correctly replace the WiFi card in the Dell Mini 9. It is a simple seven step process and only takes about five minutes. Upgrading the Mini's wireless card does have it's benefits, but isn't necessary. If you are happy with the Broadcom wireless card that comes with the Mini, if it works well, you don't need to upgrade.

After doing some research, I decided to go with the Intel WiFi Link 5100 Network adapter - PCI Express Mini Card. The Intel WiFi 5100 is a solid 802.11n (draft 2.0) wireless networking card that is fully supported in Linux. It will work out of the box in any distro running the 2.6.x Linux kernel. It worked without the need for additional drivers in Ubuntu, Xubuntu, Crunchbang Linux, Arch and Moblin. The Intel 5100 also offers faster connections to access points, wireless scanning support and the ability to sniff packets. The Broadcom card is slower to connect and does not support these features. You can find the Intel WiFi 5100 for under $30 with free shipping at Amazon.com and other retailers.

I also recommend the Intel WiFi Link 5300 Network adapter - PCI Express Mini Card. It is also 802.11n (draft) card but requires the installation of another antenna in your mini behind the LCD panel, instructions can be found here. You can find high quality Tyco antennas on ebay for about $3 with free shipping. Installing a 3rd antenna improves signal quality but is a labor intensive task.

If you're looking for a 802.11g card the Intel Pro/Wireless 3945ABG Mini PCI Express Network Card is an excellent choice.

1. Remove the Battery
1 - back of mini
- Slide the battery release tabs outwards to unlock the battery

2. Unscrew the Back Panel
2  - Remove Battery
- With a Philips/flathead screwdriver carefully remove the two screws holding the Mini's back plate.


3. Locate The Wireless Network Card
3 - Insides
- It directly under the RAM module, in the the bottom right quadrant.


4. Remove The Old Card
4 - Old Card
- Remove the two screws holding the card in place
- Gently pull the card out of the socket
- Apply light pressure to unplug the antenna cables


5. Install the New Card
5 - New Card
- Reconnect the antenna cables. Black on top, white on bottom.
- Place the two screws into the holes. I found that placing them in first is easier than trying to fit them in after then card is in place.
- Carefully slide the card back into the socket. Use the notch at the bottom of the card as a guide and remember antennas should be facing up)
- Tighten the two screws to secure the network card in place


6. Properly Secure The Antenna Cables
7 - Antenna Wires
- Placing the antenna cables under the four highlighted tabs. This will keep them from getting in the way or from getting damaged.

7. Replace The Back Panel and Battery
8 - Finishing Up


Once you have powered up your Mini, in a terminal type:
ifconfig
-This command will list the network interfaced recognized by the OS. The Intel cards should show up as wlan0.

Now to get to cracking.


Have a question or problem that this article doesn't cover?
Ask our Ubuntu Mini 9 Google Group for help.

Thursday, August 20, 2009

Smooth Flash Playback By Hacking Firefox

Everyone knows that Flash playback is the Achilles heel of Linux. It's hard to make the switch when web apps and videos do not work like they do in Windows or OSX. Coupled with the mangled Intel video driver, Flash on the Mini 9 has sucked. This hack will help improve Flash playback in Firefox.

One of Firefox's features is to keep a snapshot of all open tabs in case your browsing gets interrupted and needs to restored. By default, Firefox refreshes this snapshot every 10 seconds. This over-caching can causes errors in Flash and unnecessarily takes up processor cycles.

What this hack does is reduce the interval in Firefox's open tab caching. Instead of 10 seconds, we are going to have Firefox take it's snapshot every 100 seconds.

To access Firefox's Configuration File
Type about:config into the URL address bar
Screenshot-about:config - Mozilla Firefox
The red lines highlight the url box.
The blue lines highlight the filter box.
The filter box allows you to search your about:config file and is where you type the blue text commands.

Go to the text box for the Filter and type in: browser.sessionstore.interval
Double click the line, to change the integer value.
- 10,000 is the default value (every 10 seconds)
- change the integer value to 100,000 (every 100 sconds)

For other Firefox hacks, take a look at our "Customizing Firefox for Netbooks" article.

Have a question or problem that this article doesn't cover?
Ask our Ubuntu Mini 9 Google Group for help.

Sunday, June 7, 2009

What Was Dell Thinking With the Mini 10v

Mini 9 owners know how easy it is to mod your system, upgrading the RAM takes less than 5 minutes. This is what pulled me to the system. When Dell released the Mini 9 service manual I had a geek-gasm. The Mini 9 was the perfect netbook for Linux newcomers and enthusiasts. Unfortunately this is not the case for The Dell Mini 10v. It's a nightmare to mod.

These videos detail how many steps it takes and the components you have to remove to get to the RAM. It's not just the RAM, getting to any of the components require you to dismantle the 10v. I personally don't want to pry off the keyboard and palm rest to get to my machine. I can't believe Dell has the nerve to recommend the 10v as suitable replacement to the Mini 9. I feel sorry for 10v users who can't order a machine with more than 1GB of RAM because of Microsoft's Windows XP OEM restrictions and then have to take 27 nerve racking minutes to disassemble and reassemble their machines. I have no problem with taking things apart, but this turned me off to buying a Mini 10v all together.

Remember that you can still get some great deals on a used Mini9 and that the Dell Vostro A90 is available from Dell's business division. It's is just a black version of the Mini 9, the layout and components are exactly the same.

The 3rd Video, wasn't worth embedding because it's just him putting everything back together.

Have a question or problem that this article doesn't cover?
Ask our Ubuntu Mini 9 Google Group for help.

Tuesday, March 31, 2009

My Dell Mini 9 Hardware Profile

I've listed my Dell Mini 9 hardware profile below. If you are wondering my something has worked for me and not for you you can always check to see if we have the same hardware. Just type the blue commands in a terminal and check the output.

Hardware Profile
red@red-mini:~$ lspci -vnn
00:00.0 Host bridge [0600]: Intel Corporation Mobile 945GME Express Memory Controller Hub [8086:27ac] (rev 03)
Subsystem: Dell Device [1028:02b0]
Flags: bus master, fast devsel, latency 0
Capabilities:
Kernel driver in use: agpgart-intel
Kernel modules: intel-agp

00:02.0 VGA compatible controller [0300]: Intel Corporation Mobile 945GME Express Integrated Graphics Controller [8086:27ae] (rev 03)
Subsystem: Dell Device [1028:02b0]
Flags: bus master, fast devsel, latency 0, IRQ 16
Memory at f0000000 (32-bit, non-prefetchable) [size=512K]
I/O ports at 1800 [size=8]
Memory at d0000000 (32-bit, prefetchable) [size=256M]
Memory at f0300000 (32-bit, non-prefetchable) [size=256K]
Capabilities:
Kernel modules: intelfb

00:02.1 Display controller [0380]: Intel Corporation Mobile 945GM/GMS/GME, 943/940GML Express Integrated Graphics Controller [8086:27a6] (rev 03)
Subsystem: Dell Device [1028:02b0]
Flags: bus master, fast devsel, latency 0
Memory at f0080000 (32-bit, non-prefetchable) [size=512K]
Capabilities:

00:1b.0 Audio device [0403]: Intel Corporation 82801G (ICH7 Family) High Definition Audio Controller [8086:27d8] (rev 02)
Subsystem: Dell Device [1028:02b0]
Flags: bus master, fast devsel, latency 0, IRQ 22
Memory at f0540000 (64-bit, non-prefetchable) [size=16K]
Capabilities:
Kernel driver in use: HDA Intel
Kernel modules: snd-hda-intel

00:1c.0 PCI bridge [0604]: Intel Corporation 82801G (ICH7 Family) PCI Express Port 1 [8086:27d0] (rev 02)
Flags: bus master, fast devsel, latency 0
Bus: primary=00, secondary=02, subordinate=02, sec-latency=0
Memory behind bridge: f0100000-f01fffff
Prefetchable memory behind bridge: 0000000088000000-00000000880fffff
Capabilities:
Kernel driver in use: pcieport-driver
Kernel modules: shpchp

00:1c.1 PCI bridge [0604]: Intel Corporation 82801G (ICH7 Family) PCI Express Port 2 [8086:27d2] (rev 02)
Flags: bus master, fast devsel, latency 0
Bus: primary=00, secondary=03, subordinate=03, sec-latency=0
Memory behind bridge: f0200000-f02fffff
Capabilities:
Kernel driver in use: pcieport-driver
Kernel modules: shpchp

00:1c.2 PCI bridge [0604]: Intel Corporation 82801G (ICH7 Family) PCI Express Port 3 [8086:27d4] (rev 02)
Flags: bus master, fast devsel, latency 0
Bus: primary=00, secondary=04, subordinate=04, sec-latency=0
I/O behind bridge: 00002000-00002fff
Memory behind bridge: 88100000-881fffff
Prefetchable memory behind bridge: 00000000f0600000-00000000f06fffff
Capabilities:
Kernel driver in use: pcieport-driver
Kernel modules: shpchp

00:1d.0 USB Controller [0c03]: Intel Corporation 82801G (ICH7 Family) USB UHCI Controller #1 [8086:27c8] (rev 02)
Subsystem: Dell Device [1028:02b0]
Flags: bus master, medium devsel, latency 0, IRQ 23
I/O ports at 1820 [size=32]
Kernel driver in use: uhci_hcd

00:1d.1 USB Controller [0c03]: Intel Corporation 82801G (ICH7 Family) USB UHCI Controller #2 [8086:27c9] (rev 02)
Subsystem: Dell Device [1028:02b0]
Flags: bus master, medium devsel, latency 0, IRQ 19
I/O ports at 1840 [size=32]
Kernel driver in use: uhci_hcd

00:1d.2 USB Controller [0c03]: Intel Corporation 82801G (ICH7 Family) USB UHCI Controller #3 [8086:27ca] (rev 02)
Subsystem: Dell Device [1028:02b0]
Flags: bus master, medium devsel, latency 0, IRQ 18
I/O ports at 1860 [size=32]
Kernel driver in use: uhci_hcd

00:1d.3 USB Controller [0c03]: Intel Corporation 82801G (ICH7 Family) USB UHCI Controller #4 [8086:27cb] (rev 02)
Subsystem: Dell Device [1028:02b0]
Flags: bus master, medium devsel, latency 0, IRQ 16
I/O ports at 1880 [size=32]
Kernel driver in use: uhci_hcd

00:1d.7 USB Controller [0c03]: Intel Corporation 82801G (ICH7 Family) USB2 EHCI Controller [8086:27cc] (rev 02) (prog-if 20)
Subsystem: Dell Device [1028:02b0]
Flags: bus master, medium devsel, latency 0, IRQ 23
Memory at f0544000 (32-bit, non-prefetchable) [size=1K]
Capabilities:
Kernel driver in use: ehci_hcd

00:1e.0 PCI bridge [0604]: Intel Corporation 82801 Mobile PCI Bridge [8086:2448] (rev e2) (prog-if 01)
Flags: bus master, fast devsel, latency 0
Bus: primary=00, secondary=05, subordinate=05, sec-latency=32
Capabilities:

00:1f.0 ISA bridge [0601]: Intel Corporation 82801GBM (ICH7-M) LPC Interface Bridge [8086:27b9] (rev 02)
Subsystem: Dell Device [1028:02b0]
Flags: bus master, medium devsel, latency 0
Capabilities:
Kernel modules: iTCO_wdt, intel-rng

00:1f.1 IDE interface [0101]: Intel Corporation 82801G (ICH7 Family) IDE Controller [8086:27df] (rev 02) (prog-if 8a [Master SecP PriP])
Subsystem: Dell Device [1028:02b0]
Flags: bus master, medium devsel, latency 0, IRQ 19
I/O ports at 01f0 [size=8]
I/O ports at 03f4 [size=1]
I/O ports at 0170 [size=8]
I/O ports at 0374 [size=1]
I/O ports at 1810 [size=16]
Kernel driver in use: ata_piix

00:1f.3 SMBus [0c05]: Intel Corporation 82801G (ICH7 Family) SMBus Controller [8086:27da] (rev 02)
Subsystem: Dell Device [1028:02b0]
Flags: medium devsel, IRQ 10
I/O ports at 18a0 [size=32]
Kernel modules: i2c-i801

02:00.0 System peripheral [0880]: JMicron Technologies, Inc. SD/MMC Host Controller [197b:2382]
Subsystem: Dell Device [1028:02b0]
Flags: bus master, fast devsel, latency 0, IRQ 16
Memory at f0100000 (32-bit, non-prefetchable) [size=256]
[virtual] Expansion ROM at 88000000 [disabled] [size=64K]
Capabilities:
Kernel driver in use: sdhci-pci
Kernel modules: sdhci-pci

02:00.2 SD Host controller [0805]: JMicron Technologies, Inc. Standard SD Host Controller [197b:2381] (prog-if 01)
Subsystem: Dell Device [1028:02b0]
Flags: fast devsel, IRQ 16
Memory at f0100400 (32-bit, non-prefetchable) [size=256]
Capabilities:
Kernel modules: sdhci-pci

02:00.3 System peripheral [0880]: JMicron Technologies, Inc. MS Host Controller [197b:2383]
Subsystem: Dell Device [1028:02b0]
Flags: bus master, fast devsel, latency 0, IRQ 7
Memory at f0100800 (32-bit, non-prefetchable) [size=256]
Capabilities:

03:00.0 Network controller [0280]: Broadcom Corporation BCM4312 802.11b/g [14e4:4315] (rev 01)
Subsystem: Broadcom Corporation Device [14e4:04b5]
Flags: bus master, fast devsel, latency 0, IRQ 17
Memory at f0200000 (64-bit, non-prefetchable) [size=16K]
Capabilities:
Kernel driver in use: wl
Kernel modules: wl

04:00.0 Ethernet controller [0200]: Realtek Semiconductor Co., Ltd. RTL8101E/RTL8102E PCI Express Fast Ethernet controller [10ec:8136] (rev 02)
Subsystem: Dell Device [1028:02b0]
Flags: bus master, fast devsel, latency 0, IRQ 2300
I/O ports at 2000 [size=256]
Memory at f0610000 (64-bit, prefetchable) [size=4K]
Memory at f0600000 (64-bit, prefetchable) [size=64K]
[virtual] Expansion ROM at f0620000 [disabled] [size=128K]
Capabilities:
Kernel driver in use: r8169
Kernel modules: r8169


Broadcom Wireless Card Profile
red@red-mini:~$ sudo lshw -C network
[sudo] password for red:
*-network
description: Wireless interface
product: BCM4312 802.11b/g
vendor: Broadcom Corporation
physical id: 0
bus info: pci@0000:03:00.0
logical name: eth1
version: 01
serial: 00:23:08:1c:d9:71
width: 64 bits
clock: 33MHz
capabilities: pm msi pciexpress bus_master cap_list ethernet physical wireless
configuration: broadcast=yes driver=wl0 driverversion=5.10.79.10 ip=192.168.1.143 latency=0 module=wl multicast=yes wireless=IEEE 802.11bg
*-network
description: Ethernet interface
product: RTL8101E/RTL8102E PCI Express Fast Ethernet controller
vendor: Realtek Semiconductor Co., Ltd.
physical id: 0
bus info: pci@0000:04:00.0
logical name: eth0
version: 02
serial: 00:21:70:ba:fd:90
size: 10MB/s
capacity: 100MB/s
width: 64 bits
clock: 33MHz
capabilities: pm msi pciexpress msix vpd bus_master cap_list ethernet physical tp mii 10bt 10bt-fd 100bt 100bt-fd autonegotiation
configuration: autonegotiation=on broadcast=yes driver=r8169 driverversion=2.3LK-NAPI duplex=half latency=0 link=no module=r8169 multicast=yes port=MII speed=10MB/s
*-network DISABLED
description: Ethernet interface
physical id: 2
logical name: pan0
serial: f2:ad:88:33:40:e2
capabilities: ethernet physical
configuration: broadcast=yes driver=bridge driverversion=2.3 firmware=N/A link=yes multicast=yes

Hope this helps.

Have a question or problem that this article doesn't cover?
Ask our Ubuntu Mini 9 Google Group for help.

Monday, February 23, 2009

Repair a Broken Xorg File

A reader recently tried out Ubuntu Netbook Remix's desktop-switcher and it killed his xserver-xorg file. He rebooted and could not load into Ubuntu's graphical user interface. He left a comment about how he had to reinstall Ubuntu to fix his Mini. Reinstalling Ubuntu for a broken xorg file is like killing a mosquito with a hand grenade. Reinstalling is not necessary, the fix is simple and can be done in about three minutes.

A Little Background On The X-Server:
The X.Org Server (officially the X.Org Foundation Open Source Public Implementation of X11) is the X server in the official reference implementation of the X Window System.

The X Window System (commonly X or X11) is a computer software system and network protocol that provides a graphical user interface (GUI) for networked computers. It implements the X display protocol and provides windowing on raster graphics (bitmap) computer displays and manages keyboard and pointing device control functions. In its standard distribution, it is a complete, albeit simple, display and human interface solution, but also delivers a standard toolkit and protocol stack for building graphical user interfaces on most Unix-like operating systems and OpenVMS, and has been ported to many other contemporary general purpose operating systems. Most modern GUIs developed for Linux and other UNIX-like systems, such as GNOME, KDE, and Xfce, use the X Window System as a foundation.
from Wikipedia


How to Fix Your xorg.conf File:
In a terminal type:
sudo dpkg-reconfigure xserver-xorg
This will allow you to reconfigure your xorg settings, fixing any resolution or graphic problems. In most cases, selecting the default options will fix the majority of your issues.


How To Access the Failsafe Terminal:
If you can't boot into a graphical user interface, you can always access the failsafe terminal from your GDM (Gnome Display Manager) screen.
Start your computer and wait until you get to the GDM (pictured below).
Ubuntu_8.04_login_screen
1. Click the Options menu and select the "Select Session..." option
2. Choose the Failsafe Terminal option
3. Log in with your username and password
4. Run the command as you would in the regular terminal:
sudo dpkg-reconfigure xserver-xorg
5. For most users, select the default settings
6. Reboot your machine and everything should be in working order

Have a question or problem that this article doesn't cover?
Ask our Ubuntu Mini 9 Google Group for help.

Sunday, January 11, 2009

Skype On The Dell Mini 9

Get Skype
You can download Skype for Linux directly from the Skype website or install it from the Medibuntu repository. I prefer, and recommend, downloading it from Medibuntu. They have packaged Skype specifically for Ubuntu 8.10 in both i386 and lpia architectures. You can install the Medibuntu repository by following these steps.

To install Skype after setting up the Medibuntu Repository,
In a terminal type:
sudo apt-get install skype

Configuring The Mini's Audio
Double click the volume control icon on the gnome panel and select Preferences.
Make sure the Master, Internal Mic Boost, Capture & Input Boxes are checked, close the dialogue box.
Screenshot-Volume Control Preferences


Then increase the Internal Mic Boost volume.
Screenshot-Volume Control: HDA Intel (Alsa mixer)-2

Select the Recording Tab and turn your capture settings up. Make sure the mic icon on the bottom of the dialog box is not X'ed out.
Screenshot-Volume Control: HDA Intel (Alsa mixer)-4

Go to the Options tab and select Front Mic.
Screenshot-Volume Control: HDA Intel (Alsa mixer)-3

Configuring Skype
Go to the Options menu, under Sound Devices
skype_audio
Sound In - HDA Intel (hw:Intel,0)
Sound Out - HDA Intel (hw:Intel,0)
Ringing - HDA Intel (hw:Intel,0)
Uncheck the box that says "Allow Skype" to automatically adjust your mixer levels.
Apply the settings.

Go to the Options menu, under Video Drivers
skype_video
Check the Enable Skype Video
and also check the Start my video automatically when I am in a call box.
Select Integrated Webcam (/dev/video0)
Apply the settings.

Skype will now work with the Mini's internal mic and speakers. Configuring other devices to work with Skype is up to you. I haven't had much luck with my PS3 Bluetooth headset.

Have a question or problem that this article doesn't cover? Ask our Ubuntu Mini 9 Google Group for help.

edited by pHreaksYcle