For yet another release, Ubuntu 's Driver Manager is unable to properly install the Broadcom Wireless driver.
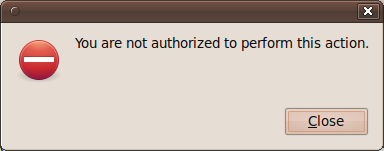
Some users are getting a permission error, telling them that they are not authorized to perform this action:
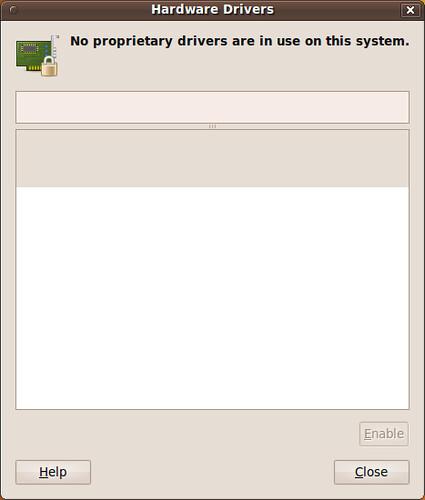
or Ubuntu is just not recognizing the card:
The Broadcom wireless card that came with the Dell Mini 9/10 or Vostro A90 does work in Ubuntu 10.04 Lucid Lynx. You just have to manually install it.
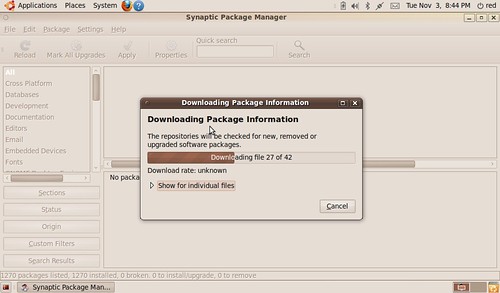
Manually installing the driver can be done two ways: Connect to the internet via a wired connection. Then go to Synaptic Package Manager (System>Administration>Synaptic Package Manager) - Click the Reload button in the upper left corner of Synaptic to refresh your repository index.
- Then install the bcmwl-kernel-source package
OR: after connecting to the internet via a wired connection in a terminal type:
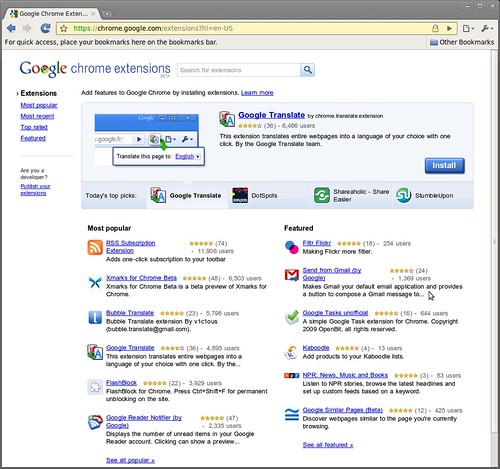
Chromium the open source web browser on which Google Chrome is based is finally complete. When I first wrote about Chromium back in July, I found it to be a very fast and capable browser, but it lacked the features I needed to be productive on the web. Since then Chromium has finally reached the maturity level to compete with other major browsers, it now features: - native GTK theming - flash playback - bookmark sync (through your google account) - extensions
It will only be a matter of time until we see the most popular features of Firefox, Opera and other browsers make their way to Chromium via extensions. Until then I'll just enjoy Chromium's fast startup time and rendering engine.
For those not yet running Chromium installing the ppa is incredible simple in Ubuntu 9.10.
sudo add-apt-repository ppa:chromium-daily/ppa
- to automatically add the Chromium PPA and GPG Key
sudo apt-get update
- update your sources
sudo apt-get install chromium-browser
- install the browser and it's dependencies
If you running an older version of Ubuntu use this guide to manually install the Chromium Daily Build PPA.
sudo apt-get chromium-browser installs the chromium-codecs-ffmpeg package by default. This package contains only the free ogg, vorbis and theora codecs needed for the HTML5 audio/video tags. If you want to install the free ogg, vorbis, theora codecs, as well as, the non-free H.264, MP3 and AAC codecs install the chromium-codecs-ffmpeg-nonfree package.
- to install the non-free repository after installing the Chromium browser.
You may be asking why I'm writing about Chromium when Google just announced Google Chrome Beta for Linux? I prefer to support Chromium because it is open source software and receives features before Google Chrome. The only real difference between the two browsers is the non-free codecs, and installing them in Chromium is easy. If you're not ready to take the Chromium plunge, you can install the Google Chrome browser by clicking here, n00b.
Usually installing the proprietary Broadcom wireless driver in Ubuntu is handled with couple mouse clicks by the Hardware Drivers (aka jockey-gtk). But Ubuntu 9.10 Karmic Koala has shipped with a bug that makes jockey unable to recognize the card and install the driver. No worries, the fix is incredibly easy and only requires a wired internet connection.
- Ubuntu is unable to recognize and install the Broadcom Driver via the Hardware Drivers.
First connect to the internet via a wired connection. Then go to Synaptic Package Manager (System>Administration>Synaptic Package Manager)
- Click the Reload button in the upper left corner of Synaptic to refresh your repository index.
- Then install the bcmwl-kernel-source package
OR: after connecting to the internet via a wired connection in a terminal type:
2. Prepare Your Install Media
- I prefer to use my external DVD drive but you can also use a LiveUSB stick to install Ubuntu. Follow these directions for creating a LiveUSB image and check our usb flash drive compatibility list for recommendations on drives.
3. Boot Into Your Install Media
- By default the Mini 9/10v and Vostro boot from the hard disk first, you need to tell the mini to boot into your install media.
- Boot your PC, when the Dell splash logo appears hit the zero (0) key to access your one time boot list. Use the DVD/CD drive option if installing from disc or the Removable Devices option for a LiveUSB install.
4. Installing Ubuntu 9.10 Karmic Koala
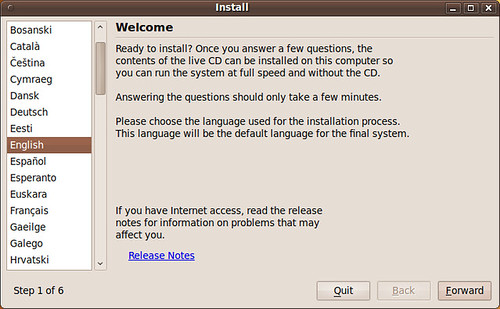
Step 1 - Choose Your Install Language
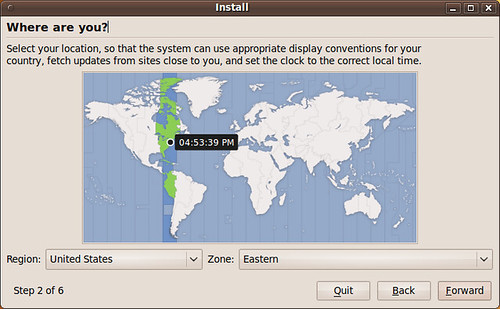
Step 2 - Choose Your Location
Step 3 - Choose Keyboard Layout
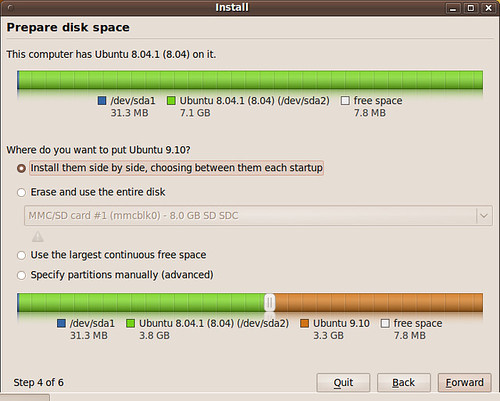
Step 4 - Partitioning the Disk
- There are three options for installing Ubuntu
If you plan on dual booting you may want to choose the Install them side option. A slider will appear and allow you to resize your partitions. This method is recommended for users that are uncomfortable with manually partitioning their drives but want to dual boot. Make sure to defragment your Windows drive before you install Ubuntu so you don't lose data.
Erase and use the entire disk is not recommended. If you plan on deleting the whole hard disk and not dual booting booting it is recommended that you partition the drive manual using the last option, it is easy and allows you to separate your /root and /home partitions. Doing this is great to protect against data loss if your install/upgrade goes bad later.
Specify partitions manually is recommended and not hard. The rest of the install guide will focus on it. It is the best way to install Ubuntu on your Dell Mini/Vostro.
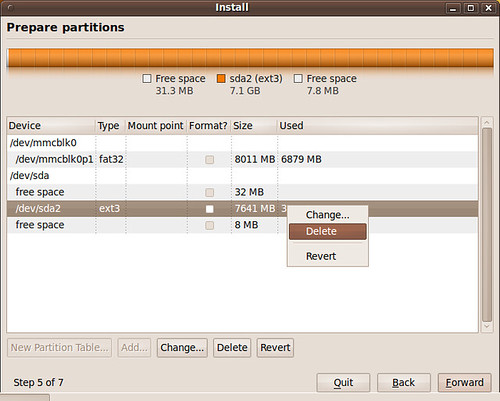
- Ignore the /dev/mmcblk0p1 in the picture, it is my SD card. I had it in while installing to save screenshots on.
- Your Mini/Vostro hard drive will be /dev/sda
- Right click the partition to delete/resize it.
- Depending on your space you have some options/decisions.
- For this guide will will be preforming a clean install with a separate /root and home partition on a 8GB SSD.
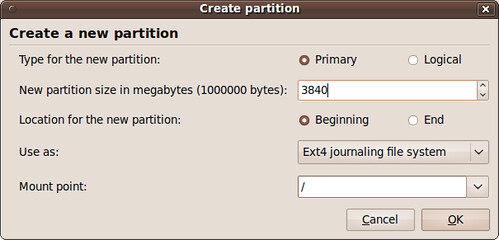
- After freeing hard drive space for Ubuntu, right click your free space and select add to create a /root partition
- Your /root should be at least 2GB but realistically closer to 4GB to avoid future problems. The root partition is where the operating system and programs are stored. I chose to use half the size of my 8GB drive for my /root partition but could have safely went as low as 2.5GB - 3GB.
- 1GB = 1024 megabytes
- The /root partition type should always be primary, start at the beginning and its mount point is /
- The file system selection is up to you, Ext4 is recommended and the fastest. Other users prefer Ext3 for its rock solid stability or Ext2 because it does not journal. Journaling protects against data corruption in the case of a power failure or system crash but it also writes more frequently to the solid state disk. Most users will want to Use Ext4, it is Ubuntu's default section.
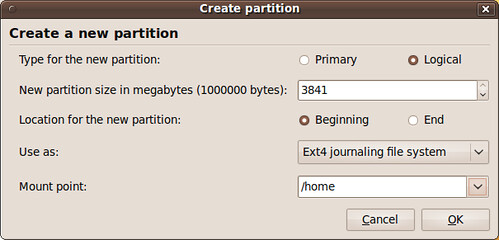
- Your Home folder will be the rest of your hard drive space. The home partition is where all your personal data and program settings are stored.
- The /home partition type is logical, should start at the beginning and its mount point is /home
- Again the file system selection is up to you, Ext4 is recommended.
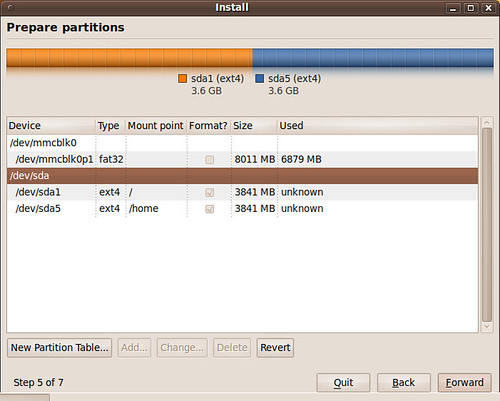
- As you can see I split my 8GB drive in two, half for my operating system /root and half for my personal files and settings /home.
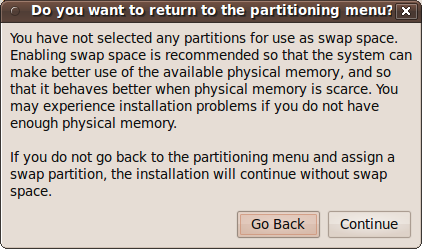
- After clicking forward you will see this pop message. This guide does not create a swap partition for Ubuntu. Swap is used by the operating system to store and retrieve data from secondary storage for use in main memory. It is not really need and if you don't have a large drive it is unnecessary.
- You can chose to go back and resize you partitions to create a swap partition. A 1GB swap partition is recommended, anything more would be overkill on a netbook.
- If you want to hibernate your Mini/Vostro you will need to create a swap partition.
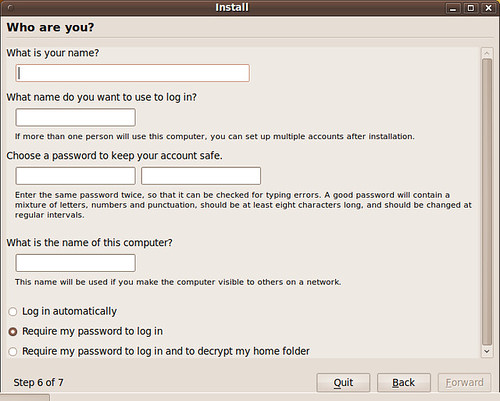
Step 6 - Who Are You?
- Enter your information, user name and password.
- You can choose to encrypt your home folder. There is a slight performance hit if you choose to encrypt your home folder but it is negligible. I have two identical drives STEC SSD drives, one is encrypted and one unencrypted, I can not tell the difference between the two.
- Encryption is a good idea if you travel, are paranoid, or just don't want anyone accessing your files.
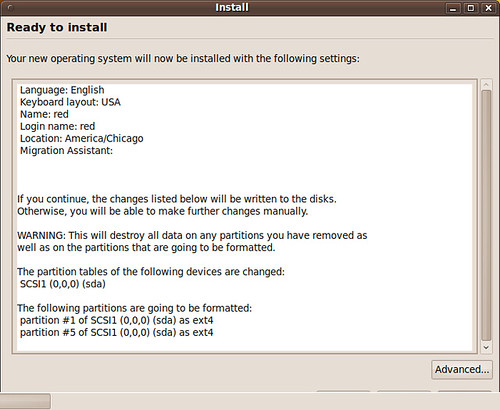
- This is the final check list before hitting install. Make sure everything is correct and begin the installation.
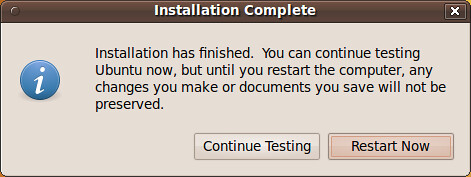
- Reboot the machine so we can fix the wireless card driver and the audio on the Vostro A90.
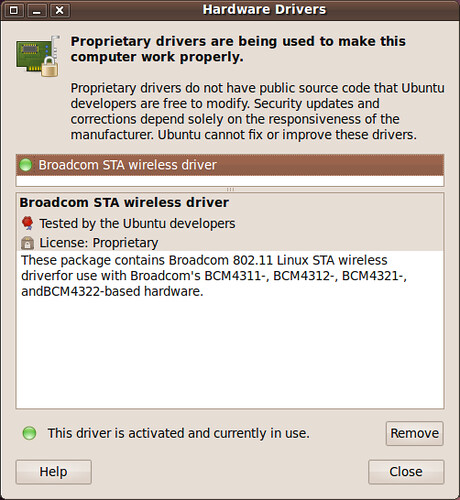
5. Install The Broadcom Wireless Card Driver
- Usually installing the proprietary Broadcom wireless driver in Ubuntu is handled with couple mouse clicks by the Hardware Drivers (aka jockey-gtk). But Karmic has shipped with a bug that makes jockey unable to recognize the card and install the driver.
- First connect to the internet via a wired connection.
- Then go to Synaptic Package Manager (System>Administration>Synaptic Package Manager)
- Click the Reload button in the upper left corner of Synaptic to refresh your repository index.
- Then reinstall the bcmwl-kernel-source package
- Click to enlarge
OR: after connecting to the internet via a wired connection in a terminal type:
Dell is currenty running a 20% off & free shipping on all Dell Mini models at it's outlet store. This includes the Dell Mini 9, 10 & 10v. All Dell outlet purchases come with the same 1 year warranty as new purchases.
While I personally love/recommend the Mini 9, the Dell Mini 10v is an excellent machine despite it's RAM upgrade procedure. It offers a larger screen (although the same resolution) and keyboard. Remember the Dell Mini 10 should be avoidedat all costs.
From WIkipedia: The Intel System Controller [that the Dell Mini 10 uses] Hub US15W for the Atom processor Z5xxseries features a GMA 500 graphic system. Rather than being developed in-house, this core is a PowerVR SGX 535 core licensed from Imagination Technologies.[22] Since PowerVR is not cooperative with the open source movement, this has resulted in the dependence on outdated closed source Linux drivers.[23]
Remember I don't work for Dell or make a dime off from Dell for this post, I just wanted to hook you guys and girls up with a sweet deal. Tell your friends, mention that they can always come to www.ubuntumini.com for help.
Mini 9 owners know how easy it is to mod your system, upgrading the RAM takes less than 5 minutes. This is what pulled me to the system. When Dell released the Mini 9 service manual I had a geek-gasm. The Mini 9 was the perfect netbook for Linux newcomers and enthusiasts. Unfortunately this is not the case for The Dell Mini 10v. It's a nightmare to mod.
These videos detail how many steps it takes and the components you have to remove to get to the RAM. It's not just the RAM, getting to any of the components require you to dismantle the 10v. I personally don't want to pry off the keyboard and palm rest to get to my machine. I can't believe Dell has the nerve to recommend the 10v as suitable replacement to the Mini 9. I feel sorry for 10v users who can't order a machine with more than 1GB of RAM because of Microsoft's Windows XP OEM restrictions and then have to take 27 nerve racking minutes to disassemble and reassemble their machines. I have no problem with taking things apart, but this turned me off to buying a Mini 10v all together.
Remember that you can still get some great deals on a used Mini9 and that the Dell Vostro A90 is available from Dell's business division. It's is just a black version of the Mini 9, the layout and components are exactly the same.
The 3rd Video, wasn't worth embedding because it's just him putting everything back together.
Thanks For Donating: ***Ioakeim Karakotsoglou*** Clayton Lively Zachariah George Ambrose Barry Lionel Smith
Adam Carter
Jerome Rosenberger James Dunne Michael Ditto Laurence Schwarz Staci Wilhelm Ed Seery Juan Carlos del Caño Sánchez Andre Alforque Natashe Firoos Khan John Campbell Richard Kurtin David Vázquez Cañoto Thomas Ullrich Frédéric Dugué Hamid Hafaoui Nathan Jones Warren Harrell Olney England Steven Brown Philippe Cordel Lee Balcom Scott Fortney Lawrence Rice Peter Van Kann Dennis Jones Judson Dunn Houston R. Allen William Hennan David Decker William Hennan Gerld Graff Gregory Ramey Asheville Technologies Lori Perez