Tuesday, March 2, 2010

Black Human GTK Theme

Black Human is based on the Ubuntu Human-Murrine color scheme by Kenneth Wimer & Conn O'Griofa.

Black Human GTK
- click to enlarge

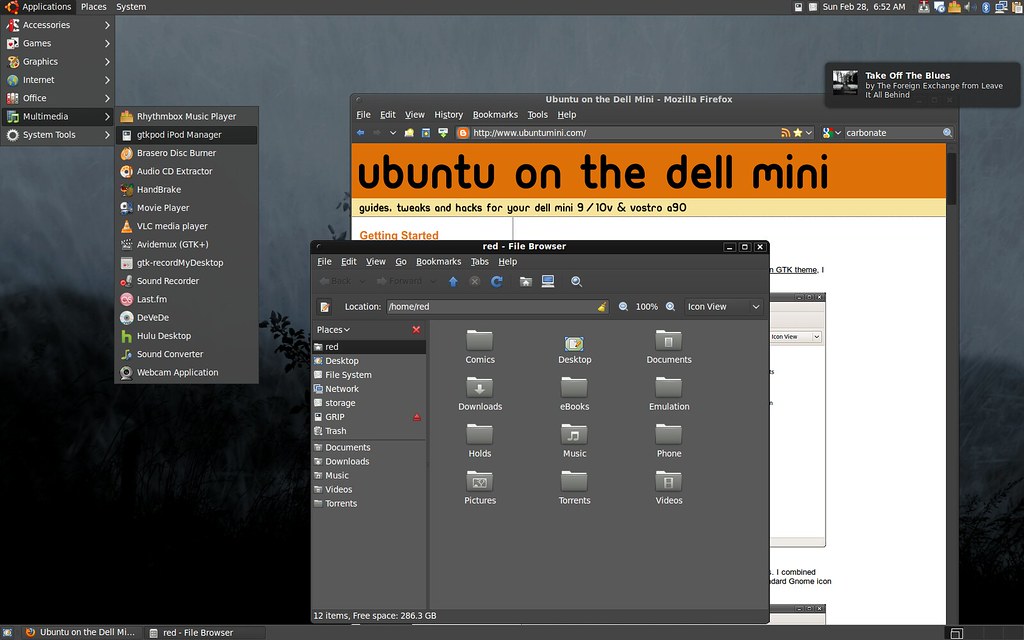
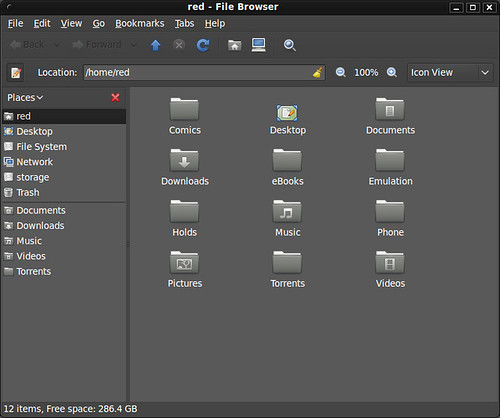
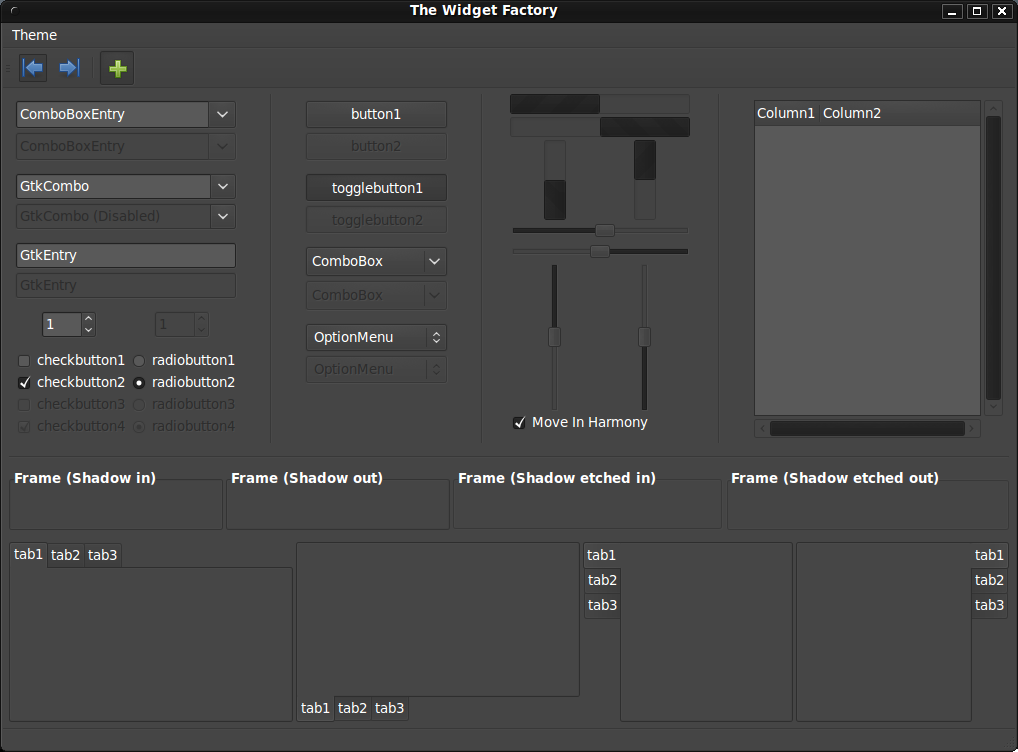
The theme uses gtk2-engines-murrine and my Carbonate icon theme. It was designed to be a black and dark grey take on the default Ubuntu Human theme.

Black Human - folder


Black Human - twf
- click to enlarge

If you'd like to install Black Human, you will first need to install some dependencies.
In a terminal type:
sudo apt-get install gtk2-engines-murrine gnome-colors-common

Also download and install my Carbonate icon theme.
- After downloading the gnome-carbonate.tar.gz, uncompress it and copy to your ~/.icon folder.

To install the Black Human GTK theme:
- Download the Black Human theme via gnomelook.org
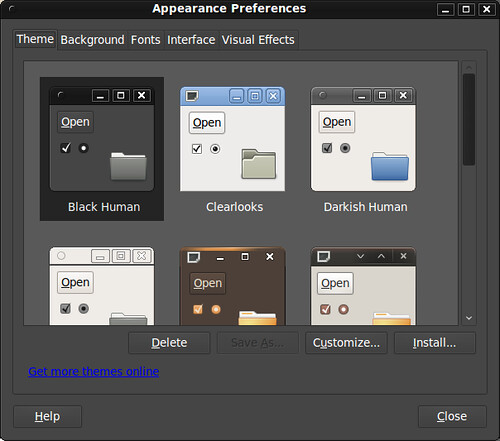
- Go to System>Preferences>Appearance.
- Click install and select the Black Human.tar.bz2 file you downloaded

Black Human Install

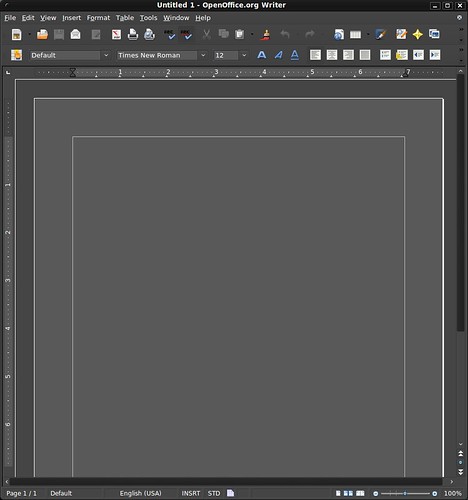
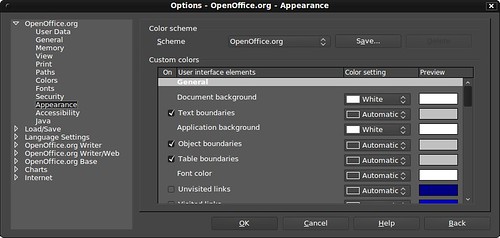
Black Human does have a few quirks. For directions on tweaking Firefox and OpenOffice to look better when using Black Human, follow the directions on my Black Human Fixes article.

If you link the theme, rate it, share it, and enjoy!


Have a question or problem that this article doesn't cover?
Ask our Ubuntu Mini 9 Google Group for help.

Black Human Fixes

If you have installed my Black Human GTK theme, you'll notice that Firefox input boxes and buttons are dark grey and don't match the rest of the webpage. OpenOffice shares a similar quirk, the document background is dark grey making text hard to read.

Firefox 3 Fix
Black Human Grey Input

Create a userContent.css file
gedit /home/red/.mozilla/firefox/*/chrome/userConent.css

Copy this into the newly created userContent.css file.
/*
* Edit this file and copy it as userContent.css into your
* profile-directory/chrome/
*/

/*
* This file can be used to apply a style to all web pages you view
* Rules without !important are overruled by author rules if the
* author sets any. Rules with !important overrule author rules.
*/

/*
* example: turn off "blink" element blinking
*
* blink { text-decoration: none ! important; }
*
*/

/*
* example: give all tables a 2px border
*
* table { border: 2px solid; }
*/

/*
* example: turn off "marquee" element
*
* marquee { -moz-binding: none; }
*
*/

/*
* For more examples see http://www.mozilla.org/unix/customizing.html
*/
/* Smooth Scrolling Workaround: Disable Fixed Background Images on Pages */
body {
background-attachment: scroll !important;
}

input {
border: 2px inset white;
background-color: white;
color: black;
-moz-appearance: none !important;
}

textarea {
border: 2px inset white;
background-color: white;
color: black;
-moz-appearance: none !important;
}

select {
border: 2px inset white;
background-color: white;
color: black;
-moz-appearance: none !important;
}

input[type="radio"],
input[type="checkbox"] {
border: 2px inset white ! important;
background-color: white ! important;
color: ThreeDFace ! important;
-moz-appearance: none !important;
}

*|*::-moz-radio {
background-color: white;
-moz-appearance: none !important;
}

button,
input[type="reset"],
input[type="button"],
input[type="submit"] {
border: 2px outset white;
background-color: #eeeeee;
color: black;
-moz-appearance: none !important;
}

body {
background-color: white;
color: black;
display: block;
margin: 8px;
-moz-appearance: none !important;
}
Save and exit the file.
You can download my custom css file here.

Black Human Input fix
- Looks much better now


OpenOffice 3 Fix
OpenOffice doesn't look quite right either.
Black Human Open Office - Broken

To get a white document background color instead of dark grey, go to:
Go to Tools>Options, then under OpenOffice.org>Appearance

Black Human Open Office - step
- Under Appearance change the Document Background & Application Background to white.

Now you get a nice clean white background for all your documents.

Black Human Open Office - Fixed


Have a question or problem that this article doesn't cover?
Ask our Ubuntu Mini 9 Google Group for help.

Monday, March 1, 2010

Flash Player 10.1 Beta 3 is Released

Adobe has released Flayer Player 10.1 Beta 3 for 32-bit Linux Machines. If you've been reluctant to install Adobe's previous testing releases, now might be time to switch. The Beta 3 release boosts speed and stability over the Ubuntu repository version of Flash and the 10.1 Beta 2 that was released back in mid-December. Flash is still far from prefect, but it's getting better.

To install Flash Player 10.1 Beta 3 in Linux:
First remove your current version of flash
- If you are using the Ubuntu repository version of Flash
in a terminal type:
sudo apt-get purge flashplugin-installer

- If you are using another version of the Flash Player Beta
rm ~/.mozilla/plugins/libflashplayer.so

- Download Flash 10.1 Beta3
wget http://download.macromedia.com/pub/labs/flashplayer10/flashplayer10_1_p3_linux_022310.tar.gz

- Untar flashplayer10_1_p3_linux_022310.tar.gz
tar -zxvf flashplayer10_1_p3_linux_022310.tar.gz

- Then create a plugin folder in the .mozilla configuration folder
mkdir ~/.mozilla/plugins
(you need to create the plugin folder if your are upgrading from the other Flash beta guides I wrote)

- Install the flash player 10.1 Beta 3 plugin
mv libflashplayer.so ~/.mozilla/plugins

- To remove Flash Player 10.1 Beta 3 and reinstall Ubuntu's repository version of flash
rm -r ~/.mozilla/plugins
then:
sudo apt-get install flashplugin-installer


Have a question or problem that this article doesn't cover?
Ask our Ubuntu Mini 9 Google Group for help.