
After doing some research, I decided to go with the Intel WiFi Link 5100 Network adapter - PCI Express Mini Card. The Intel WiFi 5100 is a solid 802.11n (draft 2.0) wireless networking card that is fully supported in Linux. It will work out of the box in any distro running the 2.6.x Linux kernel. It worked without the need for additional drivers in Ubuntu, Xubuntu, Crunchbang Linux, Arch and Moblin. The Intel 5100 also offers faster connections to access points, wireless scanning support and the ability to sniff packets. The Broadcom card is slower to connect and does not support these features. You can find the Intel WiFi 5100 for under $30 with free shipping at Amazon.com and other retailers.
I also recommend the Intel WiFi Link 5300 Network adapter - PCI Express Mini Card. It is also 802.11n (draft) card but requires the installation of another antenna in your mini behind the LCD panel, instructions can be found here. You can find high quality Tyco antennas on ebay for about $3 with free shipping. Installing a 3rd antenna improves signal quality but is a labor intensive task.
If you're looking for a 802.11g card the Intel Pro/Wireless 3945ABG Mini PCI Express Network Card is an excellent choice.
1. Remove the Battery
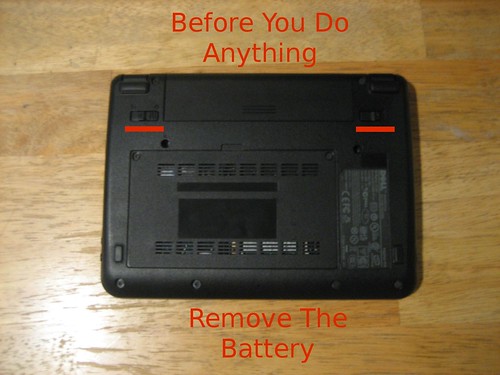
- Slide the battery release tabs outwards to unlock the battery
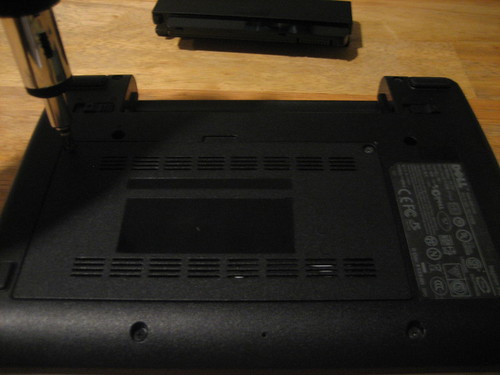
2. Unscrew the Back Panel
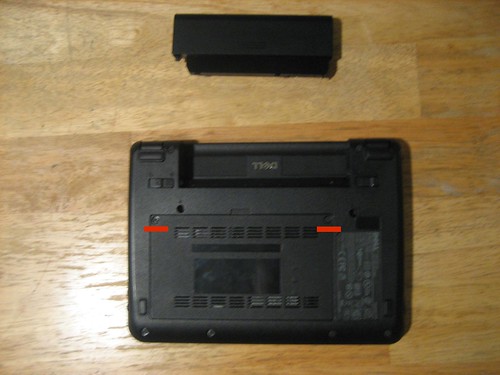
- With a Philips/flathead screwdriver carefully remove the two screws holding the Mini's back plate.
3. Locate The Wireless Network Card

- It directly under the RAM module, in the the bottom right quadrant.
4. Remove The Old Card
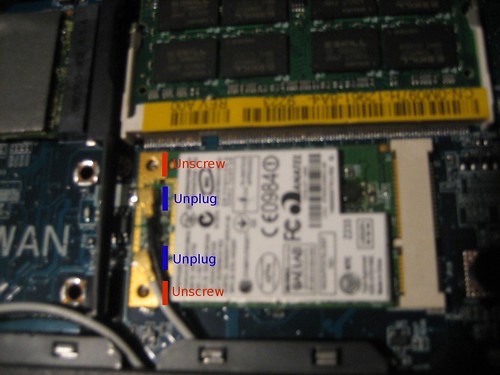
- Remove the two screws holding the card in place
- Gently pull the card out of the socket
- Apply light pressure to unplug the antenna cables
5. Install the New Card
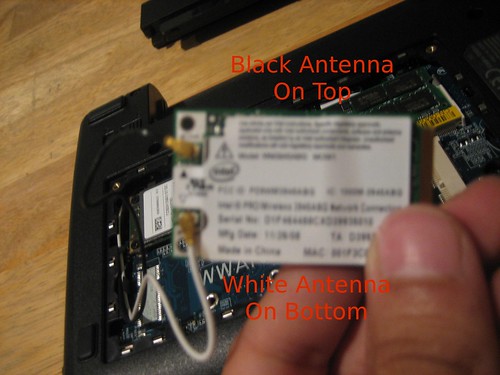
- Reconnect the antenna cables. Black on top, white on bottom.
- Place the two screws into the holes. I found that placing them in first is easier than trying to fit them in after then card is in place.
- Carefully slide the card back into the socket. Use the notch at the bottom of the card as a guide and remember antennas should be facing up)
- Tighten the two screws to secure the network card in place
6. Properly Secure The Antenna Cables
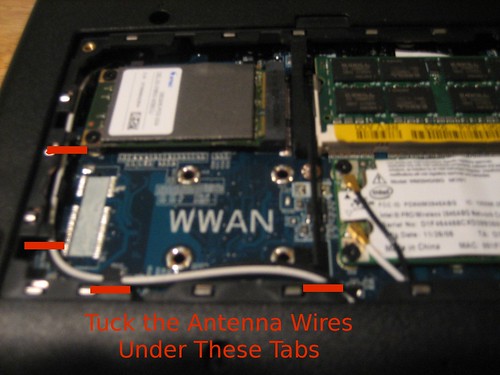
- Placing the antenna cables under the four highlighted tabs. This will keep them from getting in the way or from getting damaged.
7. Replace The Back Panel and Battery
Once you have powered up your Mini, in a terminal type:
ifconfig
-This command will list the network interfaced recognized by the OS. The Intel cards should show up as wlan0.
Now to get to cracking.
| Have a question or problem that this article doesn't cover? Ask our Ubuntu Mini 9 Google Group for help. |