This guide will show you how to use Transmission's web client to manage your torrents from another PC. Perfect for when you want to set a movie, TV show or album to download for when you get home.
On Your Home Computer/Server:- This is the PC you will be using to download torrents/running Transmission (host).
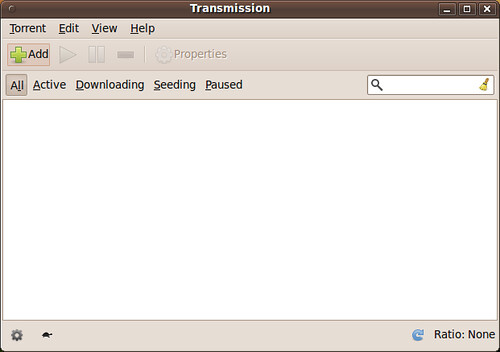
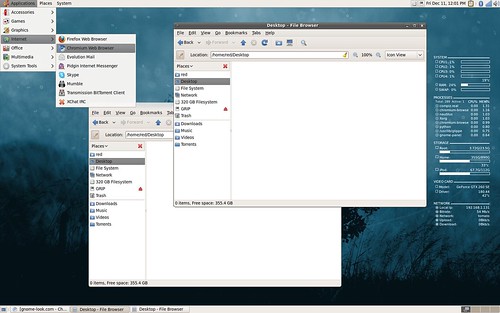
- Open Transmission, you can find it under Applications>Internet.
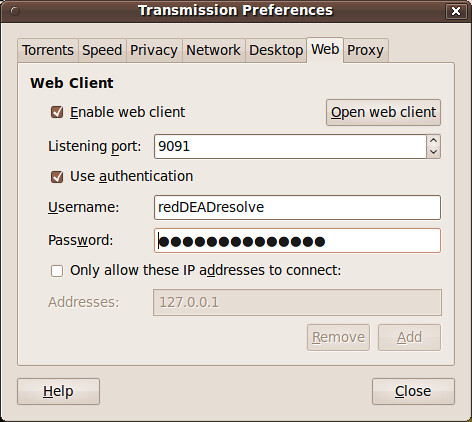
- Access the Web tab via Edit>Preferences
- Click the Enable web client box- Use listening port 9091
- Check the Use authentication box
- Create a user name and secure/strong password. For help
refer to this article on making a strong password and/or
test your password's strength- Click the Open Web Client box to test out your setup
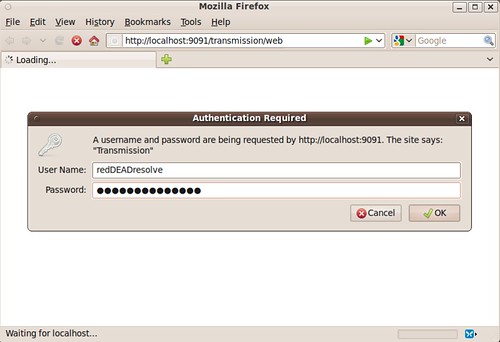
- Log on using your user name and password
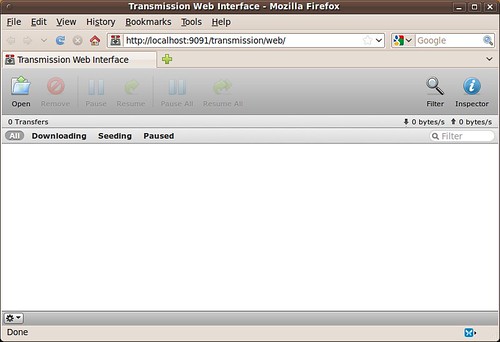
- If you can see this screen you are done with the first part of the guide
- Any torrents you have currently running should be displayed.
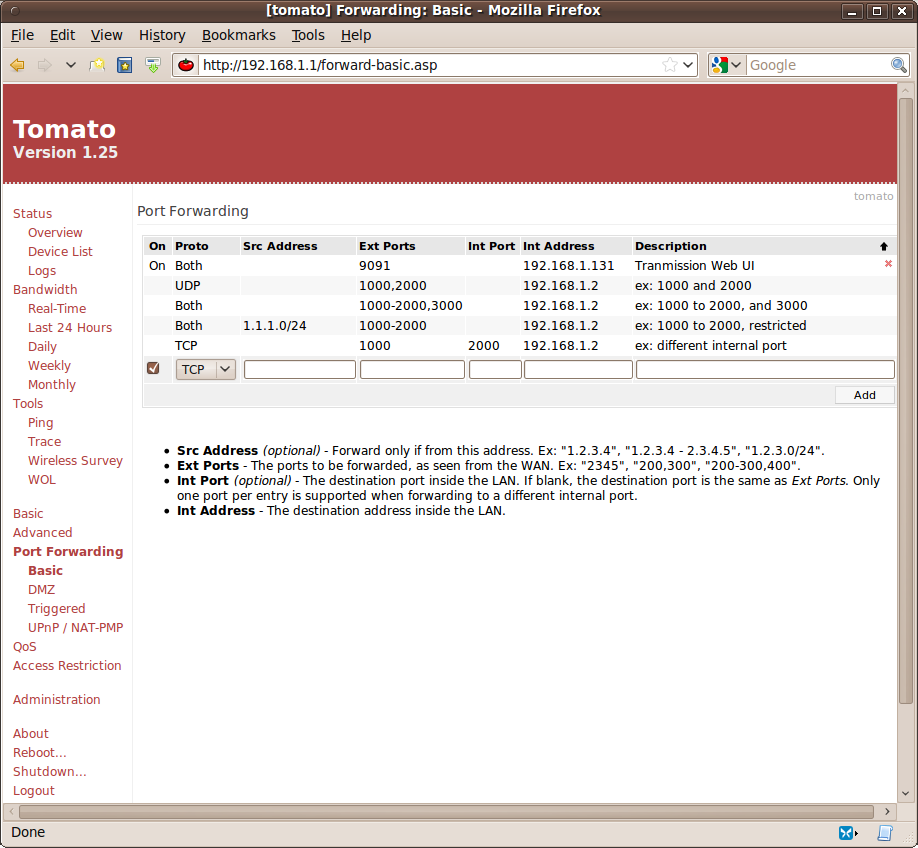
Open Port 9091 To Allow Outside Access:For this guide to work you will need to forward 9091. For help refer to
www.portforward.com. Because of all the different routers and firmware it is impossible for me to write a definitive guide.
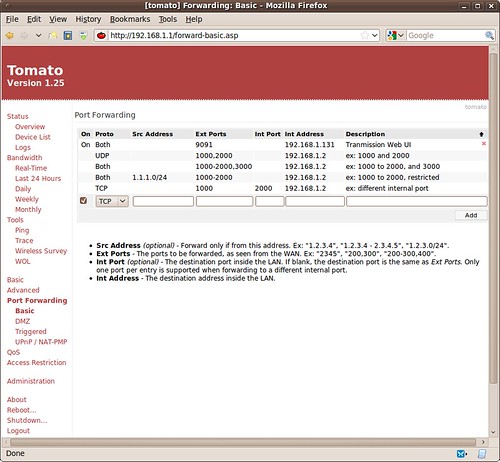
- On my
Tomato powered router, you will notice there is a simple fort forwarding tab.
- From there I just have to have to add my computer local IP address and port I want forwarded
To find your computer's local IP address for port forwarding,
in a terminal:
sudo ifconfig
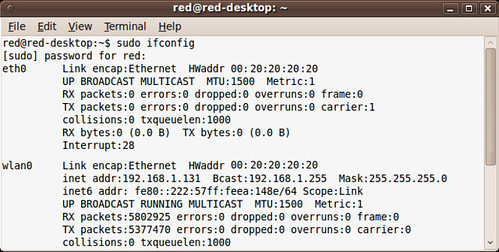
- You want to find the connection you are using. eth0 is your wired connection, wireless should be wlan0 or eth1, but it may be another device in Linux depending on your wireless card.
- Your Local IP address is listed after inet address:
* You only need to do this part of the guide on your host computer and router.Access Transmission from Another PC:Once you have enabled the web client and forwarded your listening port, you can manage your home computer/server torrents from any PC connected to the internet.
You will use this url to access Transmissions Web Client:
http://
YOUR EXTERNAL IP ADDRESS:9091/transmission/web/
- Replace the
YOUR EXTERNAL IP ADDRESS with your actually numerical external IP address.
To find your external IP Address:
http://www.whatsmyip.org/From The Web Client You Can Easily: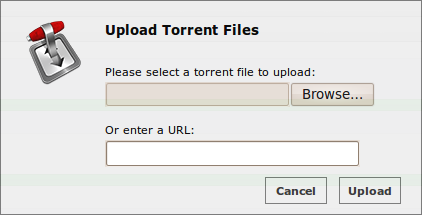
- Add torrents...
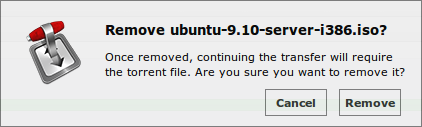
- Remove torrents
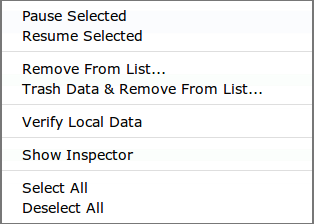
- Pause, resume, delete, verify and inspect via right click.
F.A.Q.I had the transmission web client working and then it stopped!
- Three things could be going wrong:
- Your home computer is not currently running Transmission, you have to keep transmission open and your PC on for it to work.
- Your External IP address has changed, use http://www.whatsmyip.org/ to check that it hasn't.
- Your computer's local IP address has changed. I recommend using a static IP address for your host machine. To check your local ip address run ifconfig in a terminal.
Does this guide work on the Mac, Debian, Suse, Puppy, Fedora, Arch, Gentoo, OpenBSD, FreeBSD or Solaris version of Transmission?
- Yes the guide isn't operating system specific and will work on many different Linux distributions and Macintosh OSX. On other Linux distros you might have to run the ifconfig command as root. For finding your local IP address on a Mac use this IP Address Mac Guide.
Do I have to use Ubuntu, Firefox or Linux to manage my torrents?
- The guide was written with Ubuntu, Debian and Firefox in mind, but to manage your torrents remotely you can use any browser on any operating system.
How do I forward my port with X brand router, it isn't on the list you linked to!
- I can't help you, unless you want to pay me for my time. Try looking it up on www.google.com.
Happy Torrenting!


